Homemade sandwich bread is an easy simple recipe. All you need is flour, salt, water, yeast, milk, sugar, and vegetable oil; most items are already in the pantry.
Variations in ingredients
When trying out different recipes, I found that using more milk means more flavor. The type of flour made a difference in the texture. If using all-purpose flour, the loaf will be softer whereas bread flour made the bread heartier and chewier. Either one will make great sandwich bread, however, if you plan to use it for french toast, all-purpose flour may be better.
The other variations in ingredients that did not have as much impact were using vegetable oil instead of butter and using honey instead of sugar. Vegetable oil was used in this recipe since I always have more vegetable oil on hand than butter. Any other neutral, flavorless oil can be used. When using honey for the bread, there was the issue of measuring out the honey and waiting for the honey to dissolve. This became a small nuisance and since using sugar didn’t change the taste or texture of the bread, it was easier to use sugar.
Importance of fresh yeast
It is important to use fresh yeast in this recipe. The yeast causes the bread to rise and give that big dome look of sandwich bread. I have used yeast that was stored in the freeze for a year and the dough did rise but not as much compared to using fresh yeast. If you’re not a hardcore baker, I recommend buying the packets of yeast instead of jars. King Arthur has an excellent list of FAQs and tips on yeast.
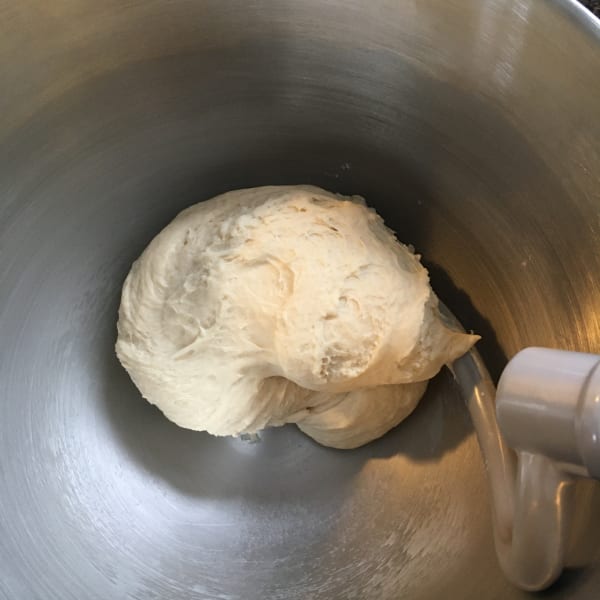
Step 1: Mixing the dough
When kneading the dough using a stand mixer, this did cause my mixer to rattle a bit. The mixer I am using is a Kitchen Aid Series 6 590W 6 quart (5.68 l). If you have something less powerful or notice your mixer is really struggling, knead on speed 2 (low) instead of 4 (medium-low) for longer, and if that doesn’t help then knead by hand for much longer. This is how it looked after it was done mixing in the mixer
After the dough is done kneading in the mixer, knead it by hand for a bit to form a smooth ball.
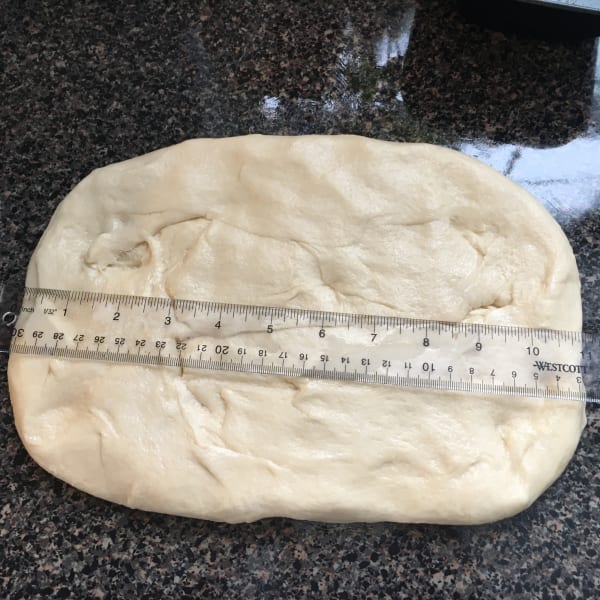
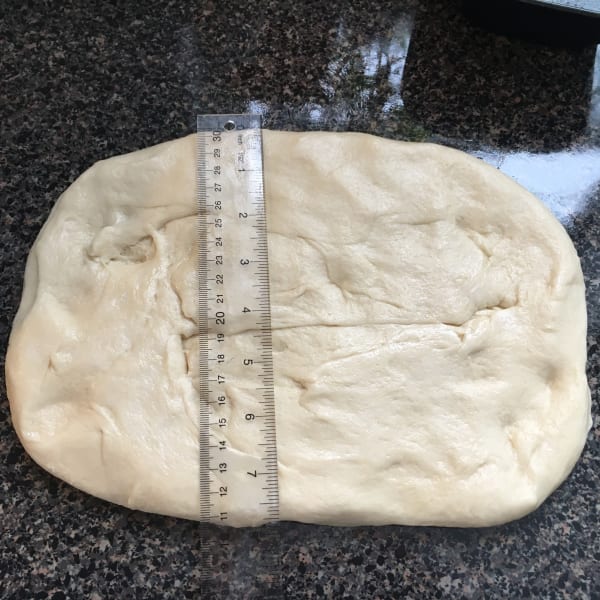
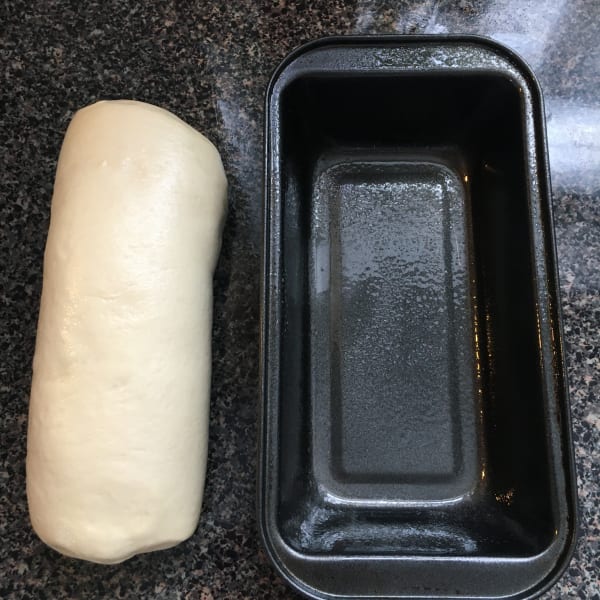
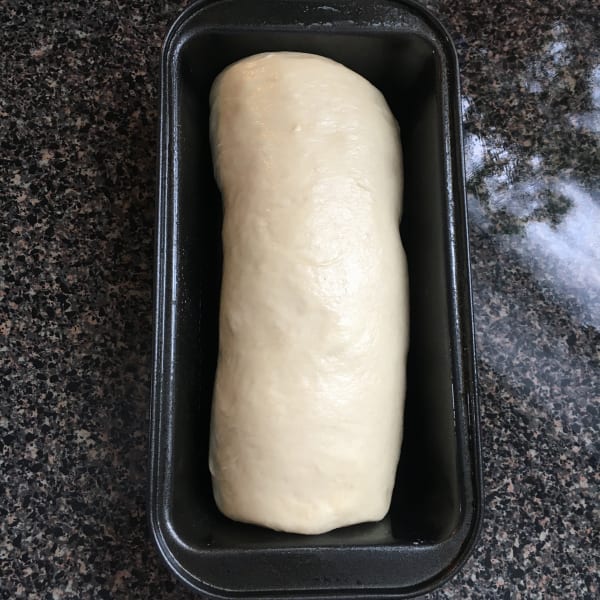
Step 2: After the first proof, time to form the loaf
Just using your hands, press out the dough to form an 8 by 11-inch rectangle.
After rolling, the log should be a little smaller than the loaf pan you’re using.
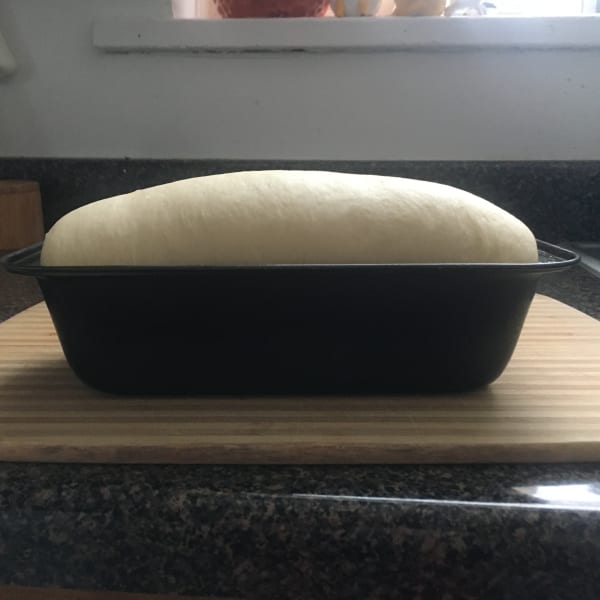
Step 3: Final rise
The dough should fill out the rest of the loaf pan and have risen above the loaf in height. Poke it with your knuckle to see if it springs back slightly and it’s ready for the oven.
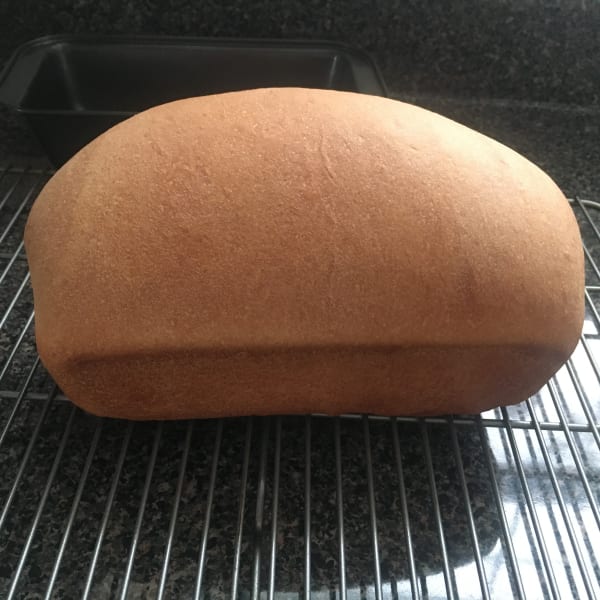
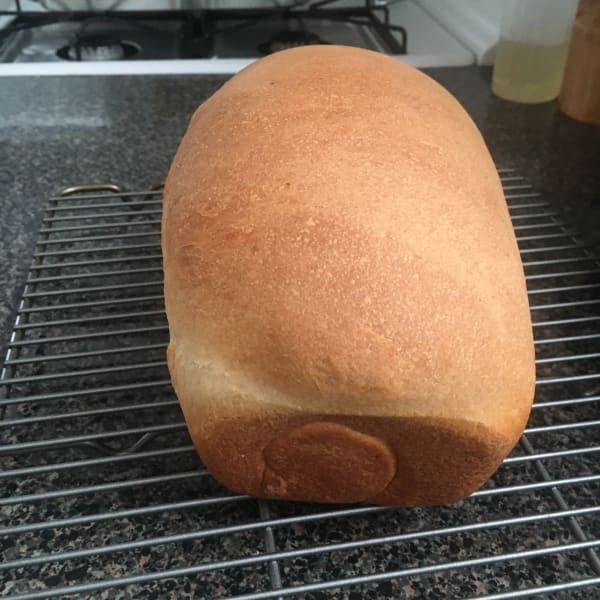
Step 4: The long wait after baking
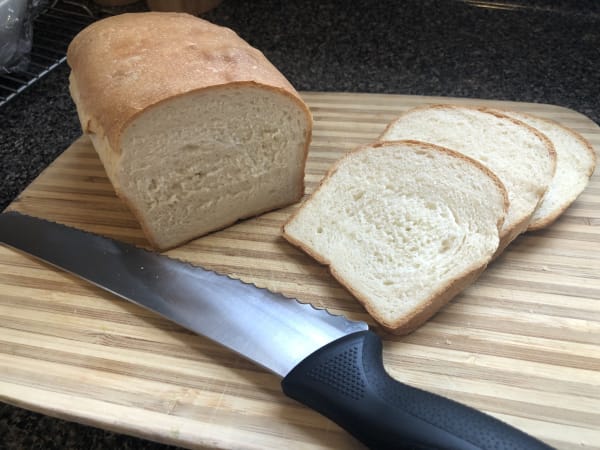
After baking, put on a wire rack to cool. The wire rack is essential for air circulation on the bottom of the bread. If you don’t have a wire rack, use something that can prop the bread up and has holes for airflow, such as a colander or a steamer.
The hardest part of the whole recipe was waiting the last 1-2 hours before cutting into the loaf. The smell when baking and watching the bread rise in the oven is so satisfying that every time I make it I want to cut it open immediately and see my creation. But, you should not!
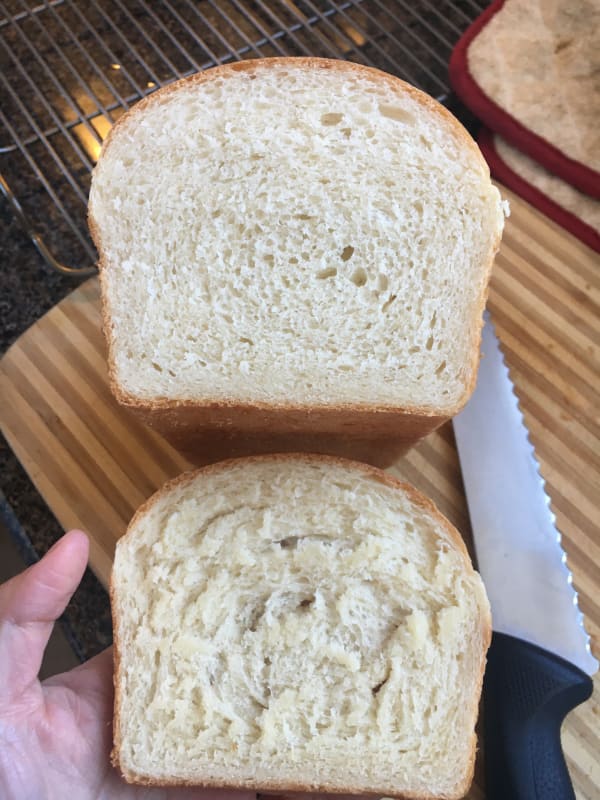
If you cut during the 1-2 hours of cool time, the crumb on the inside will not have set and it may feel moist when you eat it. The image below shows the difference between slicing the bread during the cool time (bottom slice) and after the cool time (top slice). If you do cut into it before the time is up, it’s good to know that the whole loaf once cooled will look like the top slice.
Enjoy making sandwiches!
Homemade Sandwich Bread
Prep time
15 mins
Cook time
3 hrs 30 mins
Total time
3 hrs 45 mins
Yields (loaf)
Ingredients
Instructions
Using Stand Mixer
Add all the ingredients into the stand mixer bowl. Attach the dough hook and mix on speed 2 or low until no flour remains.
Change the speed to 4 or medium-low for 6-8 minutes, until smooth and elastic. It should have no lumps and when pulled apart, the dough will shrink back quickly.
Knead By Hand
Add all ingredients into a large bowl until all the ingredients are combined. Wait 10 minutes.
Turn over onto a countertop or working surface and knead until smooth and elastic. This will take at least 15-30 minutes. It should have no lumps and when pulled apart, the dough will shrink back quickly.
After Mixing With Stand Mixer or by Hand
Get the dough into a smooth ball and grease the stand mixer bowl/large bowl with oil or vegetable spray and place the dough into the bowl. Cover with plastic wrap and let it rise until double about 1 to 2 hours.
Grease loaf pan with vegetable oil/vegetable oil spray.
Turn out the dough onto a lightly oiled surface and press out until approximately 8 by 11-inches. Hold on to the plastic wrap as we will use it again.
Roll the dough into an 8-inch log and place into loaf pan seam side down
Cover with plastic wrap for 30 minutes.
Adjust the oven rack into the middle position and preheat the oven to 350 °F. Remove the plastic wrap and continue to let it rise for 30 minutes to 1 hour until the dough springs back slightly when poked.
Bake until the loaf is deep golden brown for about 30-40 minutes. Turn the pan halfway into baking
Let the loaf cool in the pan for 5 minutes. Transfer onto a wire rack and cool until no longer warm about 1-2 hours.


 Round Potato Knishes